tp link wireless router extender steps
If your home is large or prone to Wi-Fi “dead spots” where the signal is weak, you can use a wireless bridge to help overcome these problems.
A bridge does exactly what it sounds like: it connects two Wi-Fi networks without the need for cabling. The bridge is nothing more than a second router that joins to your existing network, and extends its range.
A bridge also increases the number of wired devices you can connect to your home network via the wired Ethernet ports on the back of it. Anything you connect there is also connected to your home network, enabling you to connect devices without onboard Wi-Fi, such as DVD players or game consoles.
To do this, you need two routers, a laptop, and an Ethernet cable.
Here is how you build the bridge:
1) Write down your existing wireless settings
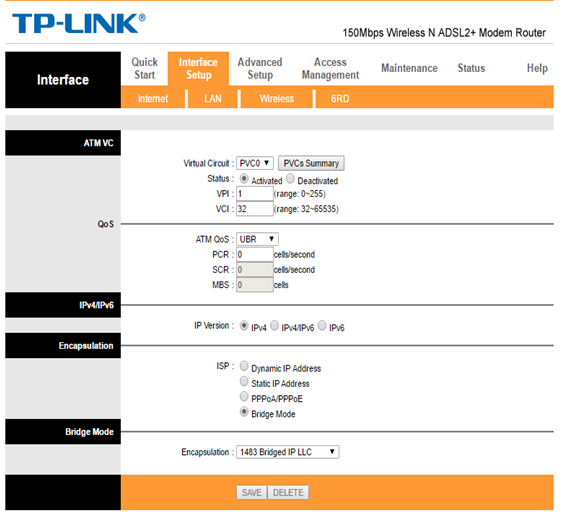
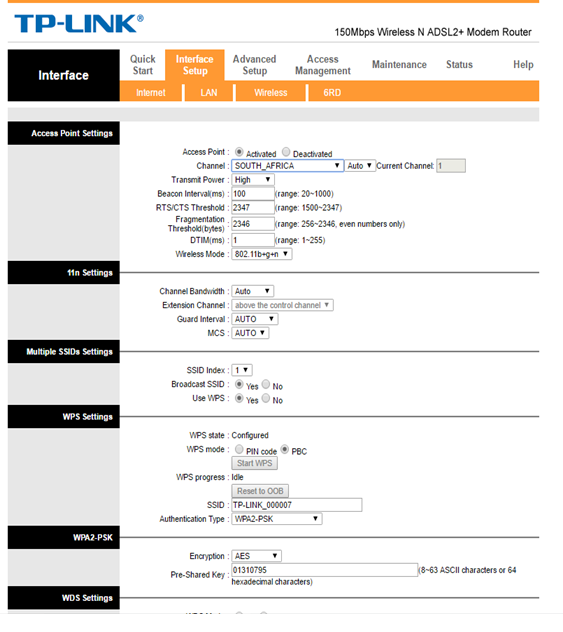
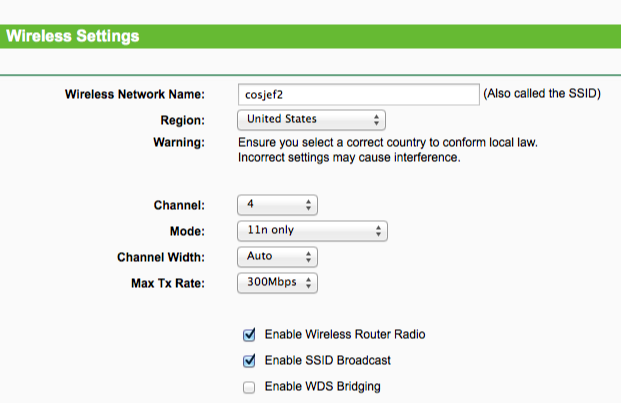
Open up the web-based management console on your existing, primary router. Browse to the Wireless/Wireless Settings section and write down the values for channel, SSID, transmission mode, and the wireless security method and password in use. You will need these value later when you configure the bridge router.
2) Connect the bridge router ( second router)
Connect the bridge router directly to your laptop with an ethernet cable plugged into any of its four LAN ports. Disable the laptop’s wifi connection, which will ensure your laptop is only talking only to the router. Power the router on, and your laptop should obtain an IP address from it.
3) Open the Administration console
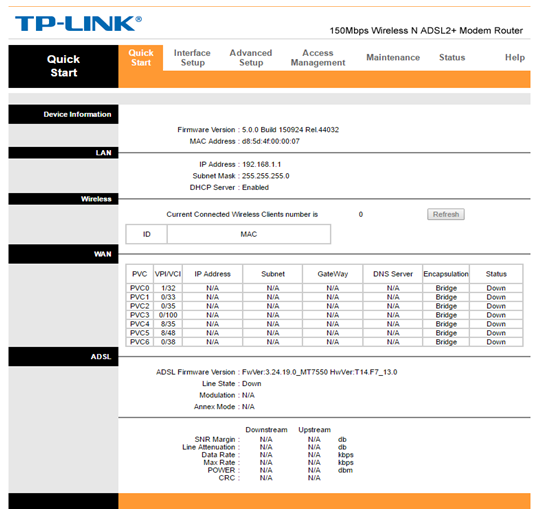
Open a web browser and go to the bridge router’s administration page at 192.168.1.1; you will be prompted for the default password of admin/admin
4) Select the Wireless/Wireless Settings section.
In this section, set a different Wireless Network Name (SSID) from the one used by your primary router. Then set all of the other settings on this page to match your primary router. After making these changes, you will be prompted to reboot the router, which you must do to ensure these changes take effect. After the reboot, move on to the next step.

5) Give the bridge router a different IP.
Open the router management console once again, and select the Network/LAN section. In this section, you will see that the router has a default IP address of 192.168.1.1, which is the same IP address as your primary router. In order to avoid an IP address conflict, change the IP address of the bridge router to 192.168.1.2. You will need to reboot the router after making this change.
 6) Setup the bridge
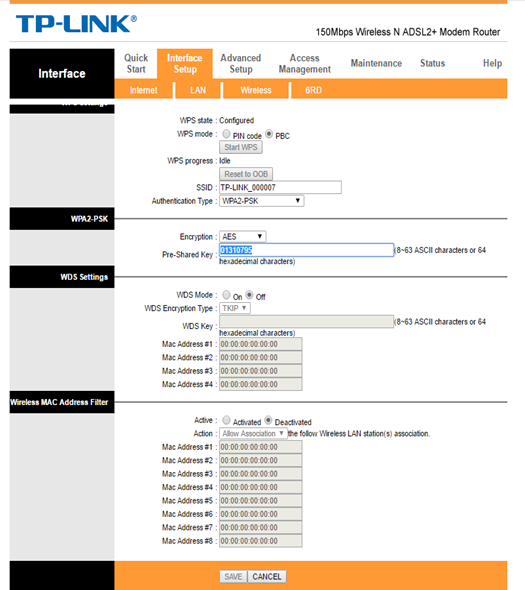
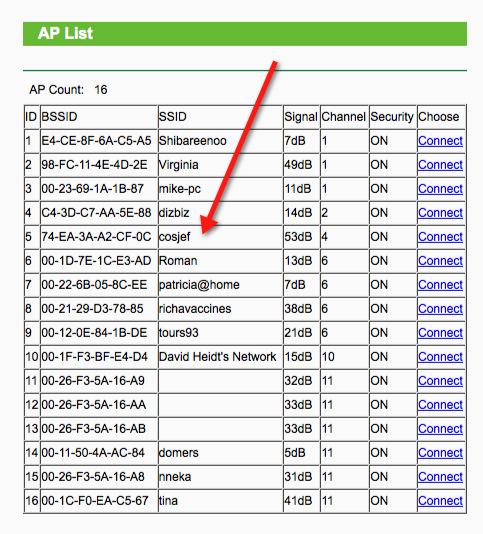
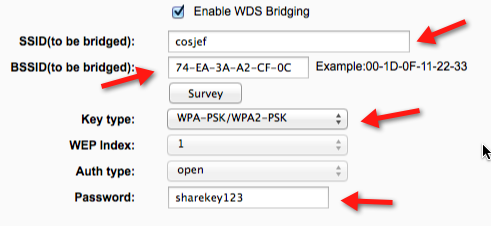
In the router management console, browse again to the Wireless/Wireless Settings section. This time, tick the checkbox entitled “Enable WDS Bridging.” This will open a drop-down section with a number of new settings. You will need to fill in the “SSID(to be bridged”) and the “BSSID(to be bridged)” sections. The fastest way to do this is click the “Survey” button. This will open a new window called “AP List” which shows you all the Wi-Fi networks in range. Look for your primary router in the list by its name (SSID), and click the “Connect” link on the right.
 You will notice that the SSID and BSSID sections are now filled out properly. Now simply enter the wireless security values you copied from your primary router. It should look something like this, with the sections with red arrows filled in. Save the settings, and your router will reboot and join your existing Wi-Fi network.
 7) Disable DHCP
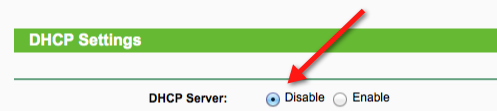
Since your primary router will be handing out IP addresses on your network, you do not want the bridged router also trying to assume this role. Select the DHCP/DHCP Settings section, and disable the DHCP server.

Then choose the System Tools/Reboot section, and reboot the router for the last time.
8) Reconnect to your primary router.
Disconnect the Ethernet cable from the bridge router and reenable your Wi-Fi. You should now see two possible SSID’s for you to connect to: the primary router and the new bridge router. Connect to the primary router, as you would normally do.
9) Validate the bridge setup.
You can perform a few tests to ensure your setup is configured correctly:
a) Browse to the administration page on the primary router. Select the Wireless/Wireless Statistics section. In this section, you should see the MAC Address of your bridge router, and some values in the Received and Sent Packets counters, indicating the connection is working. It should look like this:

Note that the MAC address of your bridge router should be printed on the bottom of the device.
b) Browse to the 192.168.1.2 address, which is the management console of the bridge router. You should be able to resolve this address and login to the adminstration page on the bridge router without issue.
If both of these test pass, you should be reasonably certain your bridge is configured correctly and running.
10) Connect to the bridge
Now reset your Wi-Fi connection to the SSID of the bridge router. You should be able to connect successfully, get an IP address through the primary router, and be able to connect to the Internet. You should also be able to connect a wired device to any of the LAN ports on the router and get to the Internet as well.
11) If any issue occurs in between you easily call our toll free number or you can log on to our web site for more informations.
Our TP -Link technical support experts . Can resolve all kinds of issues related to TP-Link Router such as installation, upgrade, configuration, uninstallation, securing network and Wi-fi, resetting passwords etc.
Toll free number:
USA : 1888 479 2017
Australia: 1800 987 893