TP-Link TD-W8968 Router
TP-LINK’s TD-W8968 300Mbps Wireless N USB ADSL2+ Modem Router is an incredibly robust all-in-one device allowing users to access high-speed internet connection via ADSL or Ethernet WAN (EWAN) using its interchangeable LAN/WAN port and share it wirelessly at 300Mbps wireless 802.11n speeds.
The TD-W8968 supports ADSL or Ethernet WAN connections (EWAN) that allow users to have the flexibility of different Internet connections among ADSL, cable or fiber modem using its interchangeable LAN/WAN port.
Follow the steps to setup TD-W8968 by Tp link tech support.
Step 1:
Obtain your Default Gateway
Step 2:
Open your Internet Browser, such as Internet Explorer, Google Chrome, etc...
Step 3:
Enter your Default Gateway in the address bar of your Internet Browser and press Enter.
Step 4:
This will display a Pop-Up Window to enter your Router Username and Password (see below image). The default factory settings for the username and password should both be “Admin”.
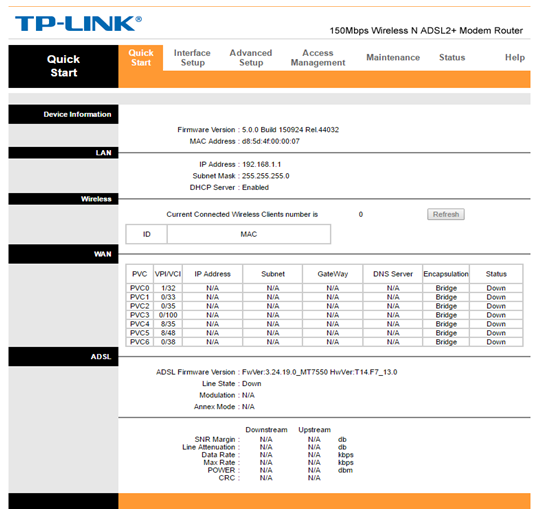
Step 5:
When you get to this page select Interface Setup:
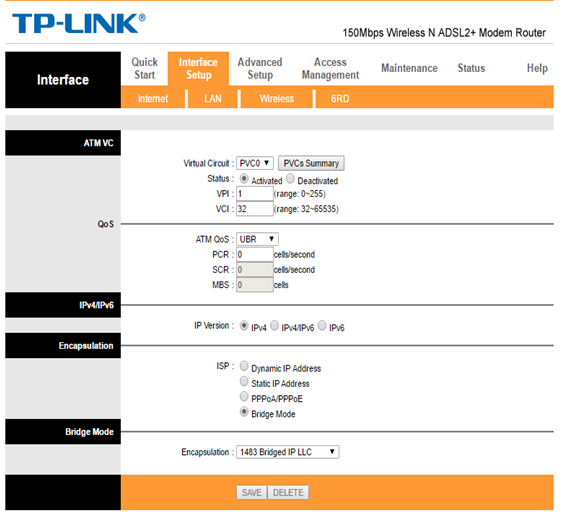
Step 6:
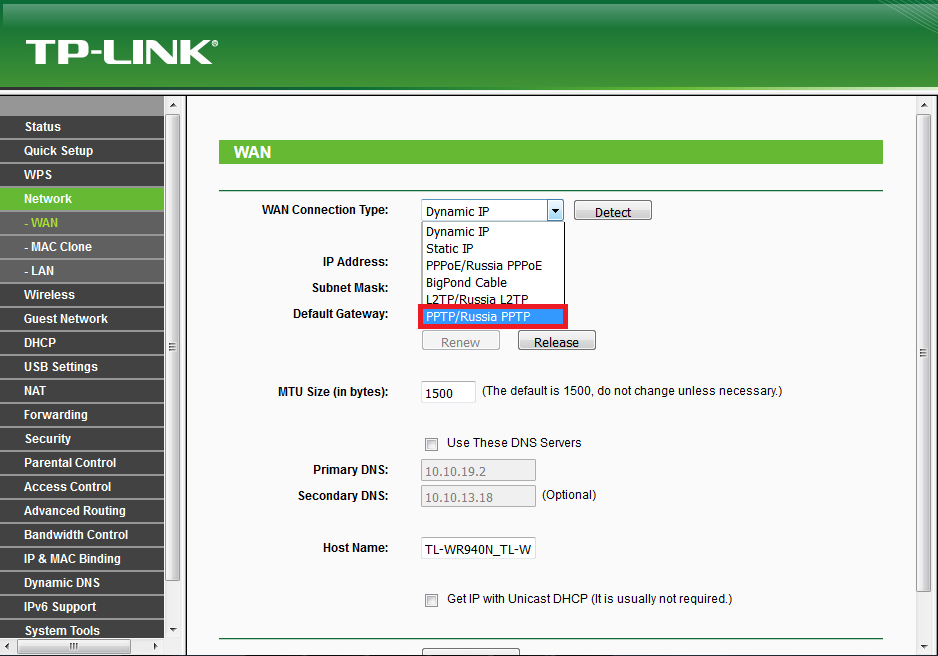
Change the encapsulation mode to PPPoA/PPPoE:
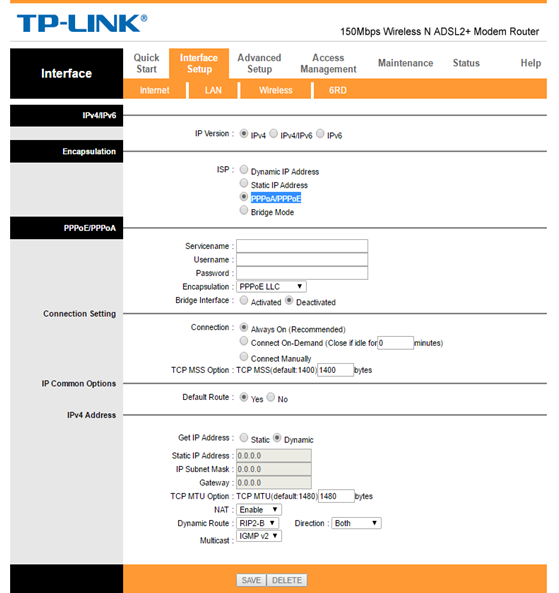
Step 7:
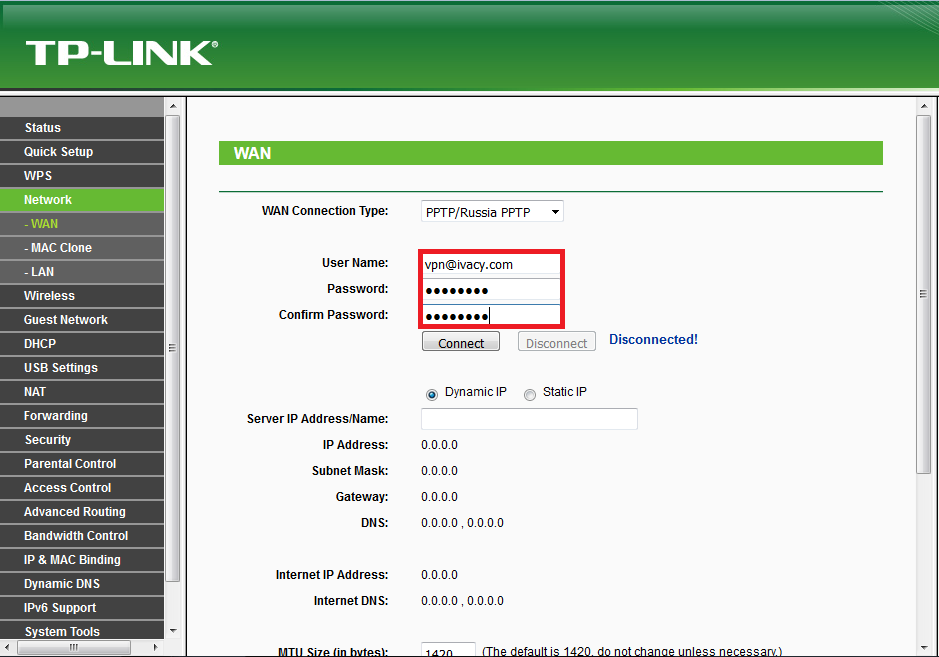
In the Username and Password field, input the Connection Username and Password that was provided by your ISP.
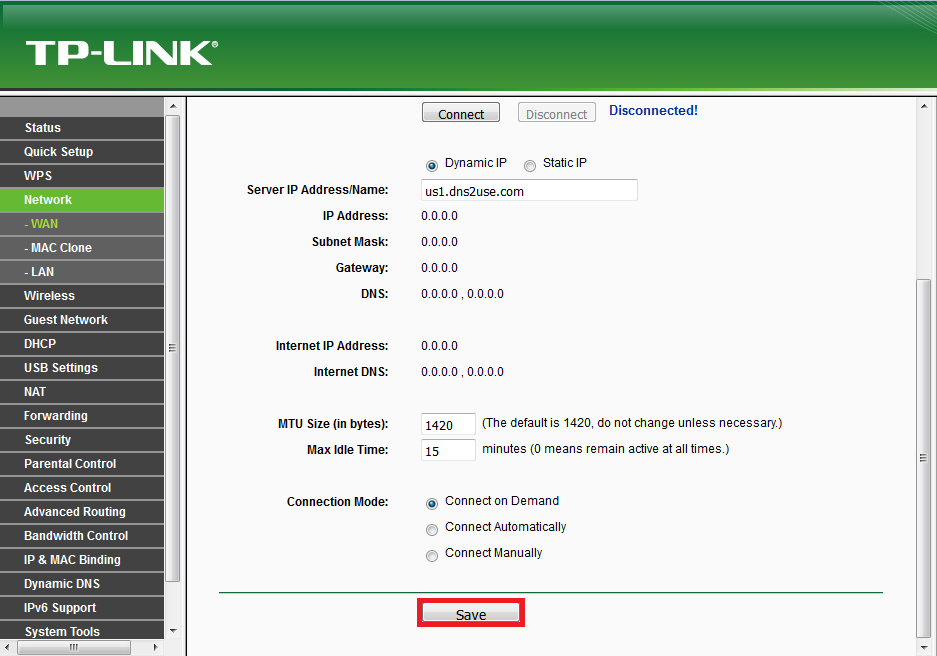
Step 8:
Select Save
Step 9:
The next step is configuring your Wi-Fi settings (wireless) as seen in image below.
- If you do not want to use the wireless feature on your Router, click on deactivate checkbox.
- If you do want to use the wireless feature, ensure that the activated checkbox is checked.
Step 10:
Enter your SSID. The SSID is the name that you want your wireless network to be called.
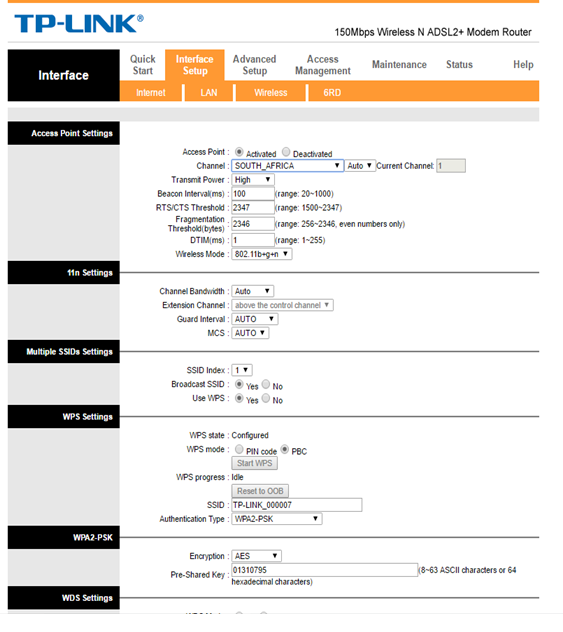
Step 11:
The following step is for your Wireless Security setting. It is advisable to have a password on your wireless feature.
Step 12
Select WPA/WPA2 if you want your wireless network password protected. Enter the Password you want in the space provided next to Pre-Shared Key:
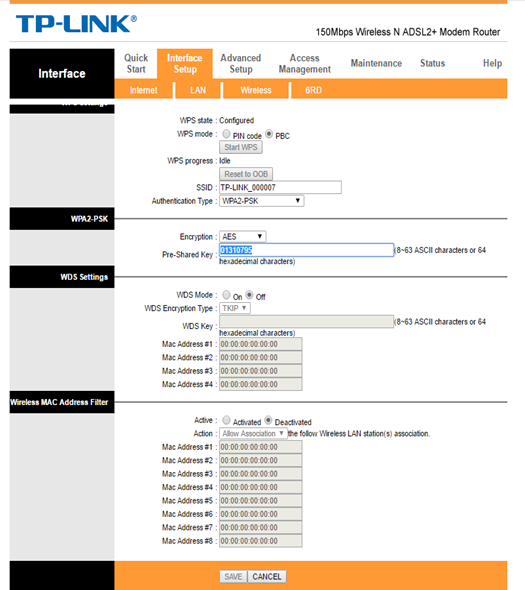
Step 13:
Once you are sure that all settings are correct, click Save
Your router might restart after it has saved the configuration.
You might need technical support if you get stuck with any issues while setting up, We suggest you to call our TP link tech support technicians to fix it, Get world class solutions at TP link tech support.
Toll free numbers:
USA : 1888 479 2017
Aus: 1800 987 893
UK : 0800 830 3300
You can visit us at our website for more info: